本文主要从TAppDecoder的使用入手,之后进行源码分析。
TAppDecoder 的使用
TAppDecoder 的使用非常简单,在官方提供的参考文档software-manual.pdf里有提到 Using the decoder. 其使用命令为
1
| |
其中的option主要分为以下几种:
| Option | Default | Description |
|---|---|---|
| (-help) | Prints usage information | |
| BitStreamFile(-b) | Defines the input bitstream file name. | |
| ReconFile(-o) | Defines reconstructed YUV file name . If empty, no file is generated. | |
| SkipFrames(-s) | 0 | Defines the number of pictures in decoding order to skip. |
| MaxTemporalLayer(-t) | -1 | Define the maximum temporal layer ot be decoded. If -1, then all layers are decoded. |
| OutputBitDepth(-d) | 0(Native) | Specifies the luma bit-depth of the reconstructed YUV file(the value 0 in-dicates that the native bit-depth is used) |
| OutputBitDepthC(-d) | 0(Native) | Specifies the chroma bit-depth of the reconstructed YUV file(the value 0 in-dicates that the native bit-depth is used) |
除上面列出的几个参数外,还有与 SEI 和 ColourSpace 相关的几个参数,再此并未列出。
TAppDecoder 源码分析
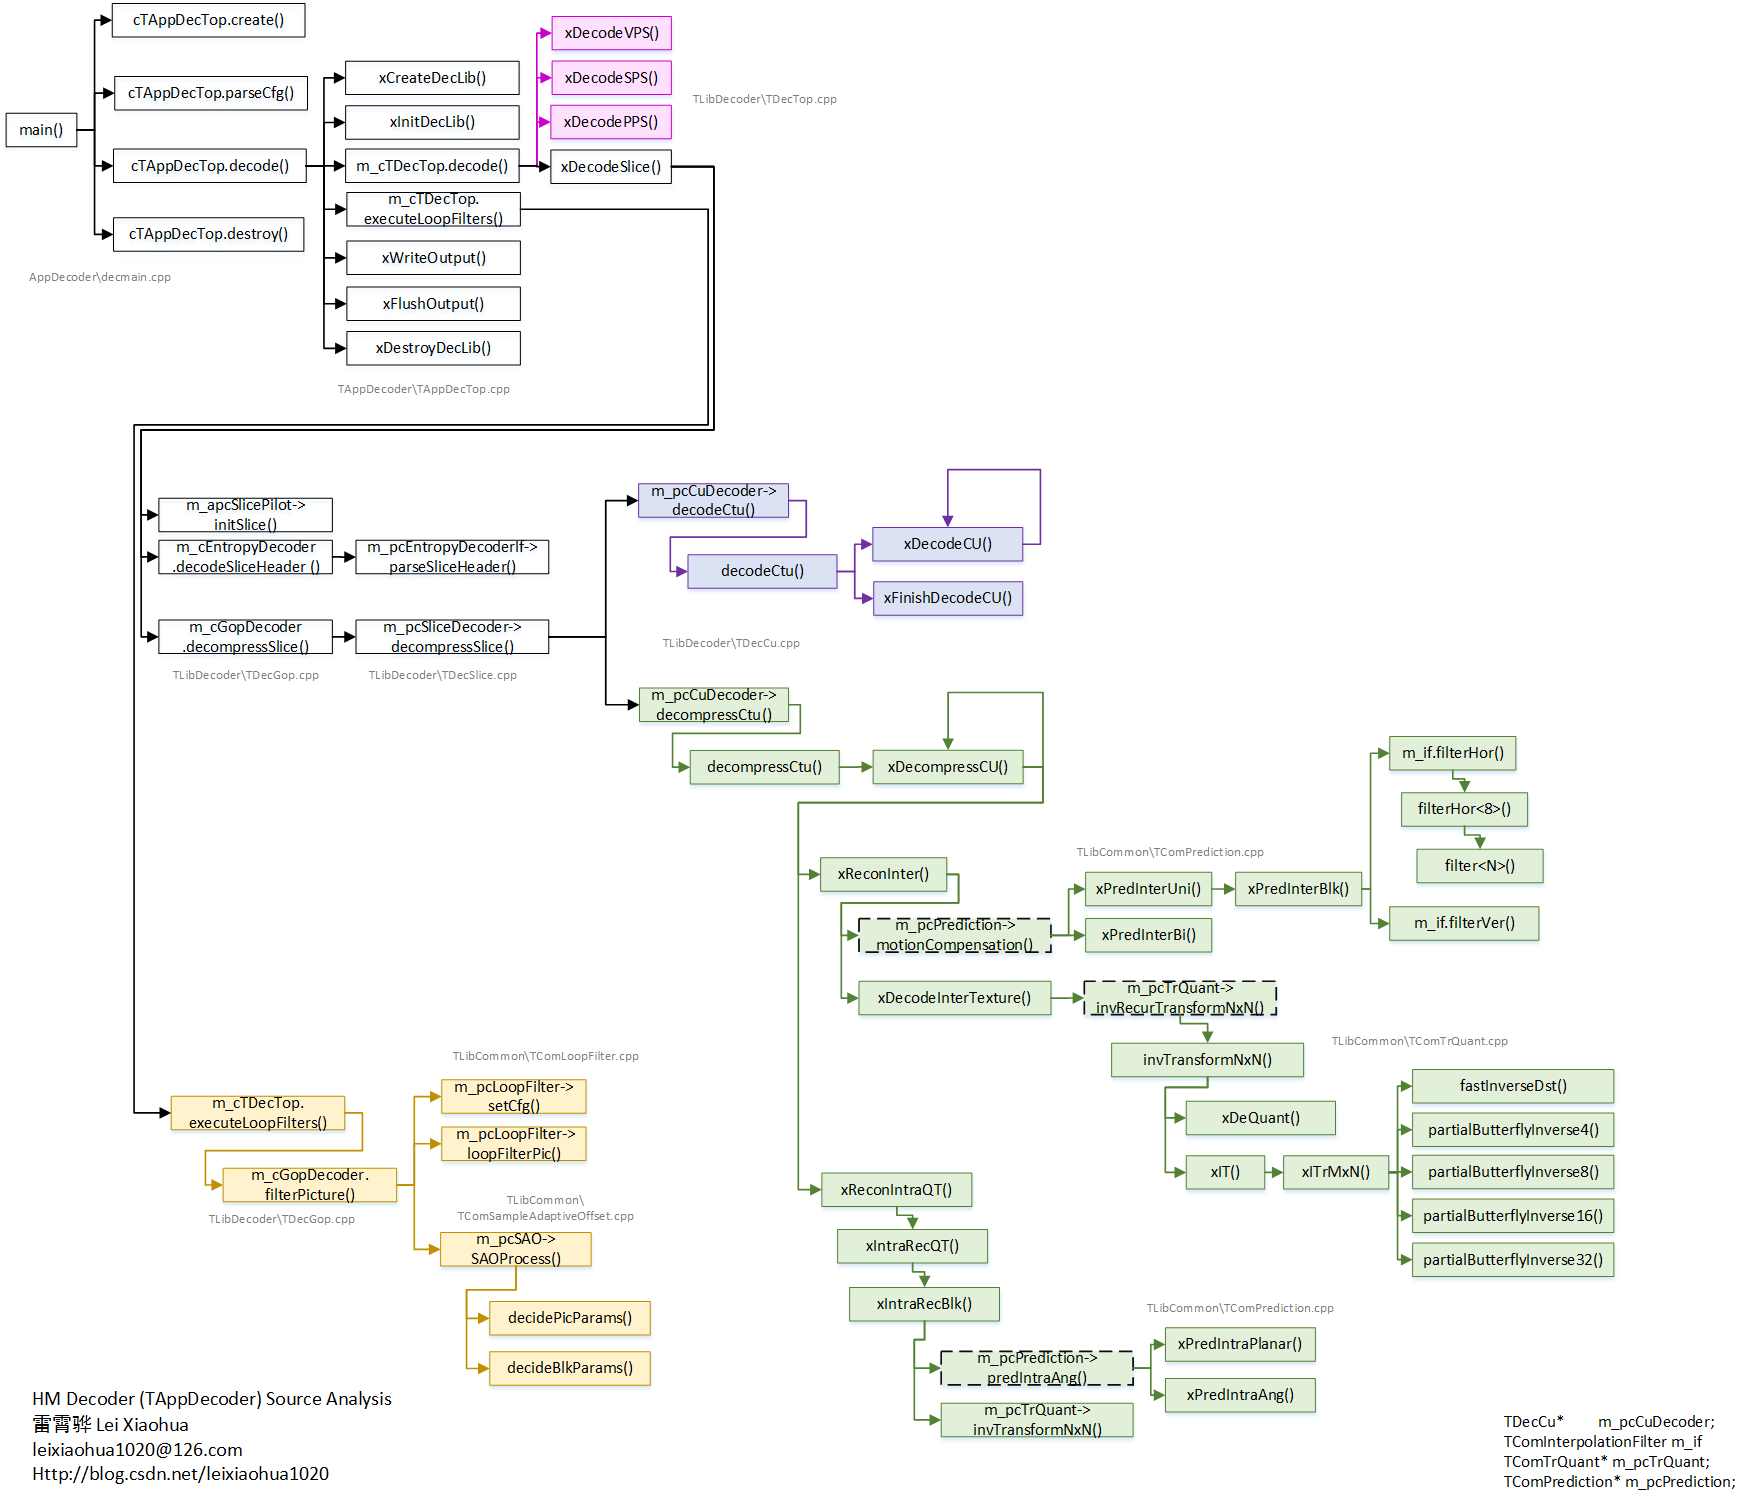
HM 中关于解码器 TAppDecoder 的函数调用关系如下图所示。参考HEVC官方软件HM源代码简单分析-解码器TAppDecoder。
Decode 过程大致可分为如下几部分:
- 创建 decoder 类(create application decoder class)
- 配置解析(parse configuration)
- 计算解码开始时间(starting time)
- 解码(call decoding function)
- 计算解码结束时间(ending time)
- 销毁 decoder 类(destroy application decoder class)
解码(call decoding function)
解码的过程又可以细分为如下步骤:
- 创建并初始化内部类(create & initialize internal classes)
- 解码 NALU (call actual decoding function)
- 环路滤波(Loop Filter)
- 删除分配的内存并销毁内部类(delete buffers and destroy internal classes)
创建和初始化类直接调用如下函数即可。
1 2 | |
解码 NALU 包括解码VPSSPSPPSSEI和Slice等 NALU 单元,注意其中Parse NALU 的函数最终调用的是
TDecCavlc类parseVPSparseSPSparsePPSparseSliceHeader来实现。
环路滤波是调用TDecTop类的executeLoopFilters函数实现的。结束后会产生 decode 图像,之后就可将 decode 出的图像
写到文件中。
最后做一些清理工作:
1 2 3 4 5 6 | |